Part 4 - The final part (at least for now, until I find somewhere else that we can expand on with this)! This part will focus on porting the keys that we have recently generated onto our YubiKey device. I own a YubiKey NEO, so i’ll be using that.
Part 4 - The final part (at least for now, until I find somewhere else that we can expand on with this)! This part will focus on porting the keys that we have recently generated onto our YubiKey device. I own a YubiKey NEO, so I’ll be using that.
Note: Be aware that the YubiKey NEO has a limitation where it can only hold keys up to a size of 2048 bits. If you have generated a key longer than this, then the move will fail. You may need to go through the previous blog posts to re-generate the keys. Though I mentioned this limitation in part 2.
The YubiKey itself is considered as a “smart card” device. When you plug your YubiKey in, you should see that it gets detected as YubiKey NEO with a combination of additional information, e.g. Yubikey NEO OTP+UTF+CCID. I believe when I originally set mine up, that I needed to download the YubiKey manager and switch modes as it didn’t show up correctly. Let me know how you get on!
C:\Users\chris>gpg --card-status
Reader ...........: Yubico Yubikey NEO OTP U2F CCID 0
Application ID ...: XXXXXXXXXXXXXXXXXXXXXXXXXXXXXXXX
Application type .: OpenPGP
Version ..........: 2.0
Manufacturer .....: Yubico
Serial number ....: XXXXXXXX
Name of cardholder: Chris Reddington
Language prefs ...: en
Salutation .......:
URL of public key : [not set]
Login data .......: reddobowen
Signature PIN ....: forced
Key attributes ...: rsa2048 rsa2048 rsa2048
Max. PIN lengths .: 127 127 127
PIN retry counter : 3 3 3
Signature counter : 149
Signature key ....: XXXX XXXX XXXX XXXX XXXX  XXXX XXXX XXXX XXXX XXXX
      created ....: 2021-02-10 17:21:57
Encryption key....: [none]
Authentication key: [none]
General key info..: sub  rsa2048/SUBKEYXXXXXXXXXX 2021-02-10 Chris Reddington <XXXXXX@contoso.com>
sec#  rsa2048/MAINKEYXXXXXXXXX  created: 2021-02-10  expires: never
ssb>  rsa2048/SUBKEYXXXXXXXXXX  created: 2021-02-10  expires: 2022-02-10
                                card-no: XXXX XXXXXXXX
Note: A good pro-tip from Scott Hanselman at this stage. If you have access to multiple smart card readers (including Windows Hello), then you may need to include a reader-port in the scdaemon.conf file at %appdata%\gnupg\scdaemon.conf. This is a step that I had to complete, so thanks Scott for the heads up on this one!
To move the GPG Key to the YubiKey, we need to use the gpg command-line once again. If you have multiple keys on the machine, then you may need to use the toggle command in GPG to select the key that you want to move across. If you’ve been following the steps from these blog posts in order (So you’ve moved the certification key off of the machine and re-imported your signing subkey), then you shouldn’t need to use this step. However, if you have multiple keys on your machine then take a look at Scott’s blog above, as he shows this approach.
Make sure that you have backed up your keys before completing the next step (moving the key to the card). Keytocard is a destructive action (as also discussed over on this GitHub issue).
gpg --edit-key YourSubkeyHere
gpg (GnuPG) 2.2.27; Copyright (C) 2021 g10 Code GmbH
This is free software: you are free to change and redistribute it.
There is NO WARRANTY, to the extent permitted by law.

Secret subkeys are available.

pub  rsa2048/XXXXXXXXXXXXXXXX
     created: 2021-02-10  expires: never       usage: C
     trust: ultimate      validity: ultimate
ssb  rsa2048/XXXXXXXXXXXXXXXX
     created: 2021-02-10  expires: 2022-02-10  usage: S
     card-no: XXXX XXXXXXXX
[ultimate] (1). Chris Reddington <XXXXXX@contoso.com>
[ultimate] (2)  Chris Reddington <XXXXXX+XXXXXXXXXXXXXXX@users.noreply.github.com>

gpg> keytocard
Really move the primary key? (y/N) y
Please select where to store the key:
   (1) Signature key
Your selection? 1

gpg> save
Chris, if it’s a destructive action - what happens if you need to copy the key onto another YubiKey device (or need to import it on the machine once again for some reason)? You can delete the secret key stubs from the machine completely, and then re-import the secret keys as shown in the previous step. Remember what we have discussed though around principal of least privilege and separation of concerns.
You’ll also want to make sure that your YubiKey has the appropriate pins set up. As described in the YubiKey docs the default pin is 12345678 and the default admin pin is 12345678. As you can imagine, these aren’t the hardest to guess - so make sure you take the time to change these, and remember them!
You can change the pins by running the below -
gpg --card-edit
gpg/card> admin
Admin commands are allowed

gpg/card> passwd
gpg: OpenPGP card no. XXXXXXXXXXXXXXXXXXXXXXXXXXXXXXXX detected

1 - change PIN
2 - unblock PIN
3 - change Admin PIN
4 - set the Reset Code
Q - quit

Your selection? 1
PIN changed.

1 - change PIN
2 - unblock PIN
3 - change Admin PIN
4 - set the Reset Code
Q - quit

Your selection? 3
PIN changed.
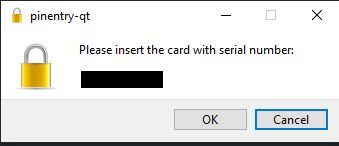
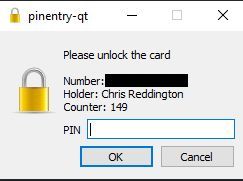
Now, go ahead and try to make a signed commit in your local Git repository. I am making an assumption that you still have the Git configuration in place from part 3 which forces all commits to be signed by the signing GPG Key (as you specified the Key ID). Before making the commit, remove the YubiKey from your machine. Now make a change, stage it and commit it to your repository locally. You should see a slightly different prompt. I see something similar to the below -

Once you’ve inserted the YubiKey, you should then see a prompt to unlock the smartcard. Your prompts may look slightly different, depending upon what tool/executable is configured on your system to handle the pin entry.

Success! You’ve now used the GPG signing key that you generated in part 2, transferred it onto a YubiKey device and generated a signed commit as a result. At this stage, you may want to generate separate signing keys for different machines/different YubiKeys so that a compromise doesn’t impact multiple devices. But, I will leave that to your discretion dear reader.
I hope that this series has been useful. Please let me know how you get on, and if there may be additional areas that are useful… Who knows, maybe a part 5?
So until the next blog post, bye for now!
Related
Okay, part 3! At this point, I’m assuming that you have already familiarised yourself with part 1 and part 2 of the series. As a quick recap, part 1 focused on why we would consider using GPG Keys in general. Part 2 focused on how to generate GPG keys along with some recommended practices on splitting out our master (Certification) key, from our specific purpose-driven keys. This post (part 3) focuses on using those keys as part of our usual development workflow using Git. We’ll be assuming that GitHub is our end target, as GitHub supports commit signature verification using GPG Keys.
Blog
Hopefully by now you’ve had a chance to read part 1 of this series, which explains why you may be interested in using GPG keys to sign your commits. Congratulations on getting to the second part! In part two, we’re going to focus on how I worked through setting up GPG in my Windows environment, and generating a set of keys for use. There were some challenges/hurdles along the way, and we’ll talk through those too!
Blog
For a while now, I’ve been using GPG Keys to sign my Git Commits to prove that my commits on GitHub are genuine and from me. Over the last few weeks, I’ve been inspired by a couple of colleagues (Kudos to Adrian and Julie if you’re reading this) to dig out my YubiKey and use these for my key signing activities. While there are several blog posts on the topic already, I encountered a number of roadblocks along the way. The intent of this blog post is to be the first of a series, where we’ll explore what GPG is, why it may be valuable to you and how you can get going using them. We’ll then take this forwards an additional step, and show how you can use YubiKeys as a second factor of verification and the benefits of this approach. By no means am I the world’s expert in cryptography, and some of these topics, but I wanted to document my own understanding for posterity, as I’ll inevitably need to repeat/review the process in the future. I hope that this may be useful to you.
Blog

